The WUSS Portal is a free part of the WUSS system. As you install the first kit, the WULogin kit, the WUSS Portal is activated along with it.
As you install the various optional kits on your website, they will automatically register themselves under the WUSS menu item on the dashboard. The various kits have various settings unique unto themselves and on this page you can learn what those various options are. As more kits are updated to make use of the Portal, their settings will be added here.
In addition to just housing the settings for the various kits, the portal also contains WordPress ShortCodes that you can use to display game information on your website. These codes will be listed under this section along with their optional parameters.
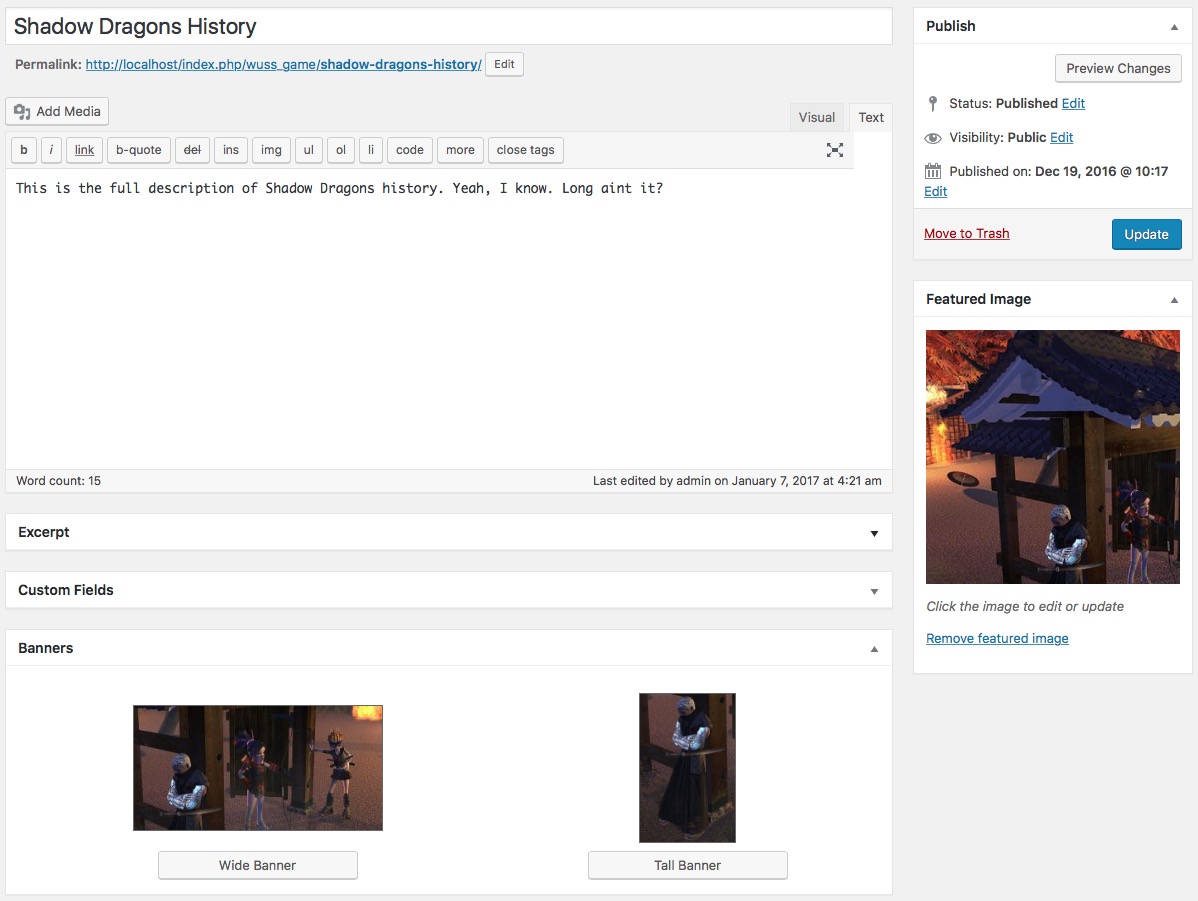
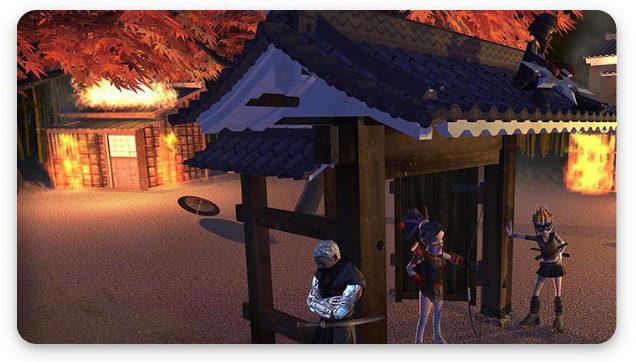
Games are defined using the familiar WordPress editor
WUSS Example
You can design your layout to your liking using HTML and the ShortCodes provided and WUSS will then display all of your games using that layout. This means you can customise the layout to be as simple or complex as you want and make it work with whichever theme you happen to be using.
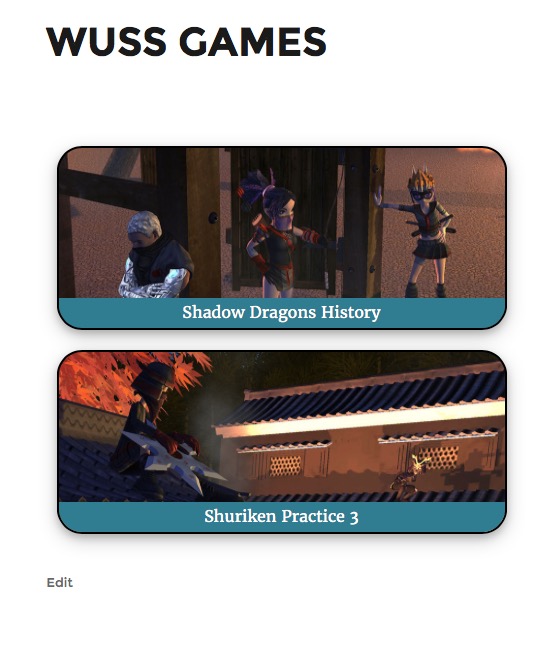
Here is the result: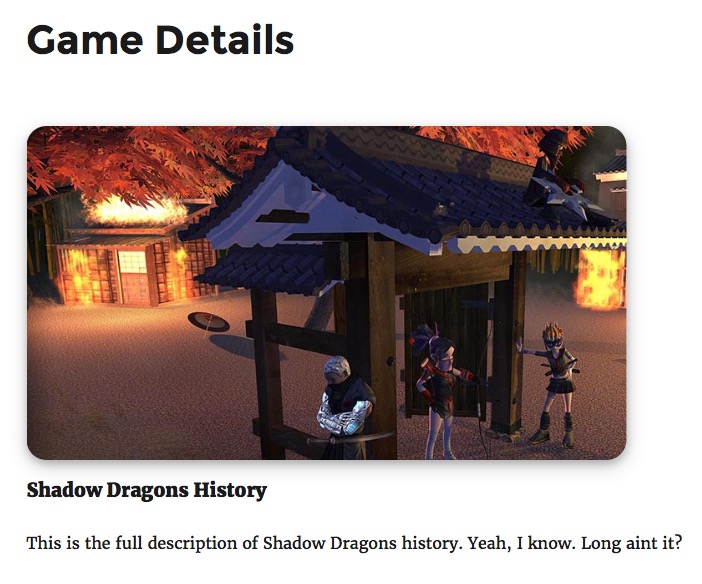
Using this simple layout: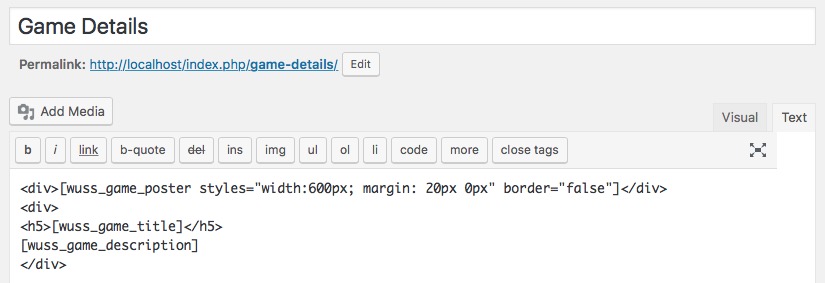
The main benefit of using the layouts is that the WUSS PORTAL can now automatically generate banners for all your games as you create them and will list all your games for you without you needing to lift a finger for each new one you add. These banners will all link to the page using your layout and will then display your game using that layout but displaying the content as you designed it to look.
Shortcodes
wuss_game_title
This tag will display the game’s name.
This requires a Game Id in the page URL or else a specific game can be selected using the ‘gid’ attribute. Normal use would be to use it without any parameters.
wuss_game_description
When creating your game you have access to the full WordPress editor to create your game’s description. This tag will insert that description into your page.
This requires a Game Id in the page URL or else a specific game can be selected using the ‘gid’ attribute. Normal use would be to use it without any parameters.
wuss_game_summary
This tag will display the post excerpt.
This requires a Game Id in the page URL or else a specific game can be selected using the ‘gid’ attribute. Normal use would be to use it without any parameters.
wuss_game_poster
This requires a Game Id in the page URL or else a specific game can be selected using the ‘gid’ attribute. This ShortCode also has a ‘styles’ attribute in which you can specify any CSS formatting that you would normally add to a ‘style’ attribute, thereby overruling the CSS class values that come as preset.
By default it displays with rounder corners, a thin border and a DropShadow. All of which can be overruled using the ‘styles’ attribute above but the border can also be disabled by using the ‘border’ attribute. Simply set it to anything other than ‘true’ and the border will be removed from the graphic.
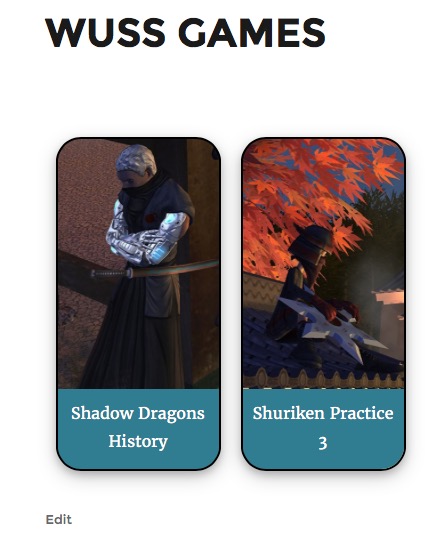
wuss_banners
This ShortCode has only one (optional) parameter called ‘horizontal’. Set it to ‘true’ to use a horizontal banner layout or anything else (or even omit it completely) to use the vertical banner layout. This tag will display banner images of all your games, one after another, and point the viewer to the page you created to showcase your products.
 |
 |
wuss_game_account_standing
This tag will display the account status of a logged in user. Guests browsing the site will not see anything but logged in users will see one of 4 results:
If their account is banned or it is suspended they will see either “Account is banned” or “Account suspended”, respectively. If their account is in good standing you can choose to either display “Account in good standing” or to simply not display any status message.
To omit the good standing value set parameter ‘show_good’ to ‘false’.
By default, accounts in good standing display the status in green while the suspended and banned statuses are displayed in red. You can change these colours using the ‘good_color’ and ‘bad_color’ parameters, respectively.
All output is prepended to the value of the ShortCode. Depending on whether or not you show a message you might want to add a break after the message. If you did want to add extra HTML after the message, simply add the text between the opening and closing ShortCode. If you are omitting the value or a guest is viewing the page, that text will be removed.
This requires a Game Id in the page URL or else a specific game can be selected using the ‘gid’ attribute. Normal use would be to use it without any parameters.
Example use:
In this example either the suspend or banned message will be displayed along with the line break, or the status message will be omitted along with the line break resulting in the account status always being shown above the poster without adding unnecessary white space if the account is in good standing.
Alternatively, if you always want to show the logged in user’s status, all you have to write is this:
[wuss_game_account_standing]
General Settings
Game settings
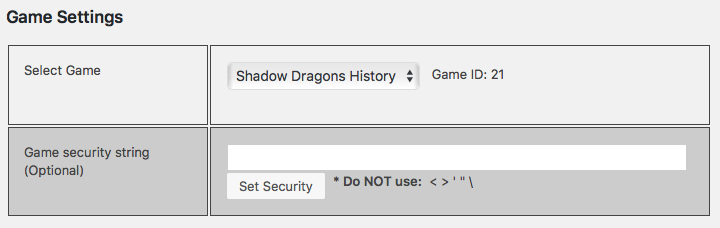
When you add the WordPress login prefab to your scene you are asked to provide a unique game ID for your title. Use the Game ID value presented here as your Game’s ID.
Every game has an optional security string that you may use to authenticate the incoming traffic as coming from your game. If you want to make use of this feature simply type in a string that is between 1 and 128 characters in length (making sure not to use the characters listed on the page) and hit the “Set Security button”. Now simply copy and paste the string into the WordPress Login prefab in your project and you are all good to go.
This feature simply takes all the data you are sending, adds your secret string to it, creates an MD5 encrypted string from all of that and sends that string along with your data. Once it reaches the server, the server will attempt create the same value using the data you sent it. If it fails to do so then the script dies immediately and no action is taken. An error is sent to your project to tell you the authentication credentials didn’t match, allowing you to take appropriate action in the event of this error occurring (i.e. stop showing the “Loading” spinner or progress bar or popups or whatever else you have going on).
Player Status
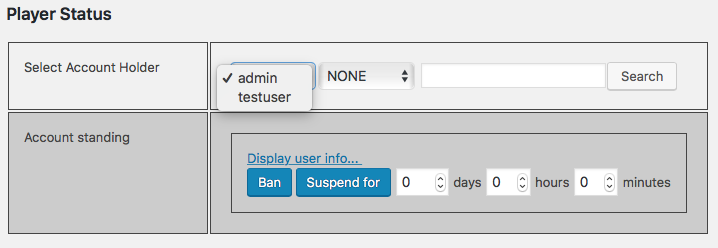
In this section you can ban a user from playing a specific game or you can temporarily suspend his access to the game. You are able to run multiple games on one WordPress install but since it is unlikely that the same user will get himself banned from every single game you ever create, you are required to first select the game you want to work with, then select the user you want to administer.
For games with a small community you can simply use the dropdown box to find the user in question. If your game has grown rather popular and you have a large player base you can filter the results by clicking on the box next to the usernames to filter by alphabet letter or numeric value. Alternatively you can search for the user using the search bar. Searches find users by username, display name and nickname and if it finds the user it will list the user’s username in the drop down box. If the user was not found the username of the first user’s (almost assuredly the site admin) username will become selected instead.
To temporarily deactivate an account, simply use the 3 inputs to specify the amount of days, hours and minutes the player’s account should be locked for and click the “Suspend for” button. To ban a user, simply ignore those values and just hit the “Ban” button. Please note that this will not cause the player to be logged out of the game if a game is current;y in session, but it will prevent future logins from succeeding.
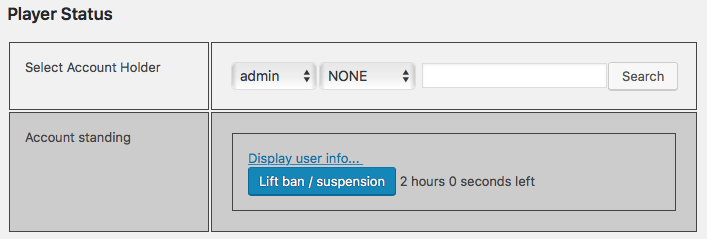
To reverse a ban or a suspension, simply click on the “Lift ban / Suspension” button. Make sure to select the game first, then the player before you take action.
Global Settings
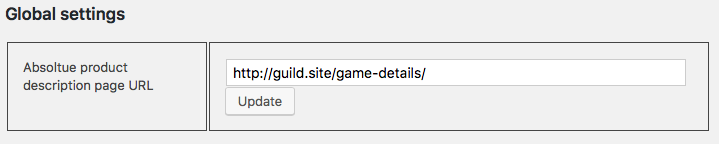
For now the only setting in here is the “Global product description page URL”. If you decide to make use of the WordPress ShortCodes to list your games on your webpage, each graphic will like to more information about your game but instead of you having to create a separate page for every game, I can make all of those links point to a single page that will display only the info about the selected game.
Using the ShortCodes you still have total creative freedom on what goes where on your page, what size the game poster is, whether you want to use widgets on the page and all the other stuff you normally do when you create a page. Once you have created your ideal game info page simply copy the full path to that page into here and then I will know where to send people to when they click on your game’s banners.
Data
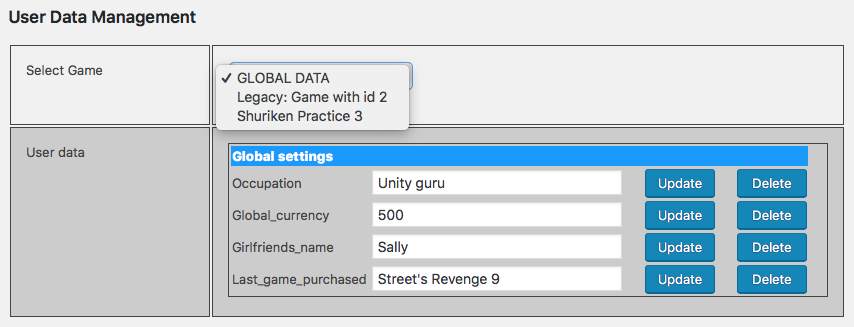
The Data kit allows you to store any data you want to your website. Having multiple players write multiple entries to your database and you not having any means of viewing or modifying that data is just simply a bad idea. To that end the data kit has shipped with a beta version of a management tool that allowed developers to view, edit and delete data from their websites.
In this first full release of the editing tool you now have a lot more control over finding the data you are looking for. As always, player’s data is saved under categories and each category is printed in highlights followed by the data it contains below it. Deleting all content under a category automatically deletes the category also. Finding the data is now as simple as using a drop down box, optionally filtered by alphabet letter or you could simply type in the username, display name or nickname of the person you are looking for. It works exactly the same as the search tool in the user management section with the exception that it also contains a first entry called “GLOBAL DATA”.
GLOBAL DATA is data that does not belong to any one user but is shared by the entire application. when this is selected you will not be prompted for a user but if you select a game you will then be prompted to select a user. All data is displayed by category and filtered per user, per game; thereby preventing an unmanageable wall of data from being displayed.
High scores and leaderboards
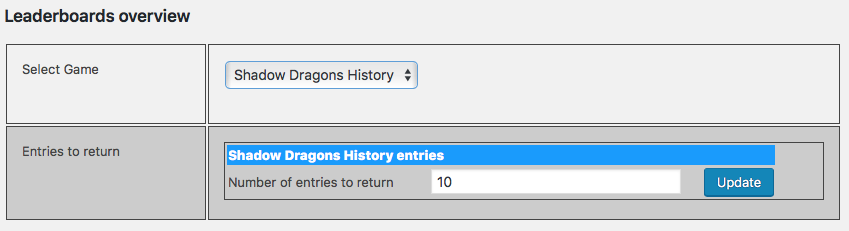
You are able to set how many scores to display per game when viewed within Unity. You are also able to select a default value in case you don’t want to set this value per game. This setting, however, can be hardcoded within your game’s code thus giving you freedom of choice to either define the number of scores to display in advance or to change that number dynamically at any time using the website.
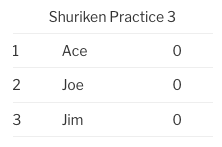
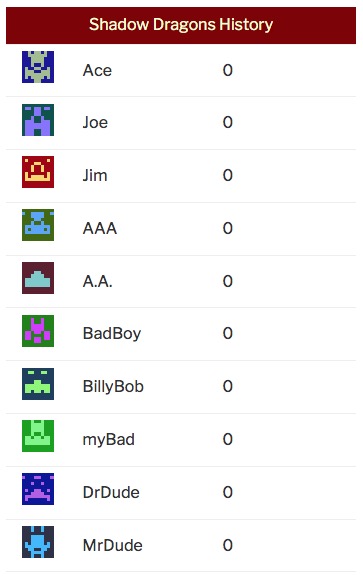
You can now also display your high scores as a widget on your website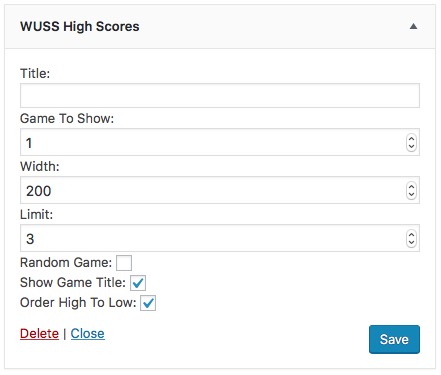
- Title is optional and will display where widget titles normally display
- Game to show allows you to specify a specific game to show on a specific page. Set to 0 to display a random page or to make it scan the URL for dynamic pages
- Width allows you to force the table width in which the widget displays
- Limit allows you to specify how many scores should be displayed
- Random game will force the widget to display a random game’s scores.*1
- Show game title is optional also and will print just above the scores*1
- Order High To Low allows you to list scores in order of highest score first or in terms of fastest time first, i.e. smallest value first
Styling can be applied using the included CSS file but is kept to a minimum so you can place it over existing backgrounds or whatever else you wish to do.
You can also display your high scores on pages and posts by using the following shortcode:
You have the same options as above (minus the widget title, of course) and can apply them using the following optional parameters, respectively:
gid - Defaults to specified, then looks at URL then first defined game

width - Default is 400

limit - Default is 5

random - Default is false

show_name - Default is true

sort_order - Default is 'DESC'. Alt is 'ASC'
In addition to the options form the widget you can also specify the size of your gravatar icon using gravatar_size. The default size is 32. In a future update I will enable you to pick gravatar types other than Retro.
*1 Only applies to games created using the wuss_games POST type under the WUSS dashboard item
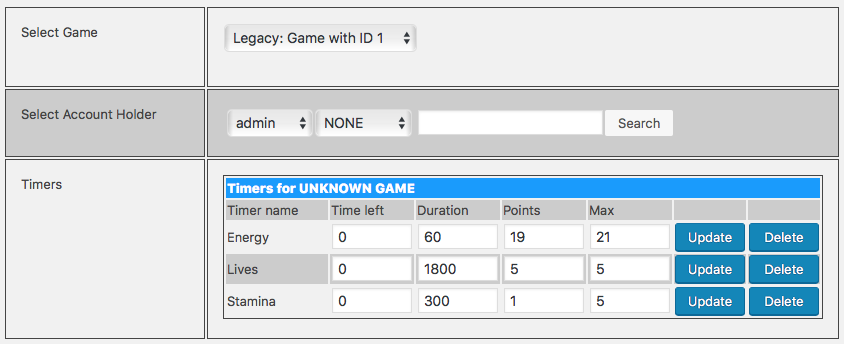
Timers
Timers are created inside of Unity and require absolutely no configuration on the server at all. Just create an instance of the class and it will generate the timer for you and then the server is in charge of making sure players can cheat the system.
I have, however, included a means for you to monitor the timers that are created on your server. You are now able to view all the timers of any given user playing any game that uses this kit. You are also able to modify any value or completely delete a timer if you need to.